この記事は Alibaba Cloud の日本サイト の環境(ドキュメントやアカウント、そのアカウントでの検証結果)に基づいて記載しています。 日本サイトと国際サイトでは各プロダクトごとに提供機能が一部異なることがあります(そのほとんどは国際サイトの方が日本サイトよりも多機能になっている)。記事の内容は適宜最新化する予定です。
フリーソフトの”rclone”でAlibaba Cloud OSSへバックアップする話を基本編とGCP編の2つの記事にまとめました。
目次
1. rcloneとは?
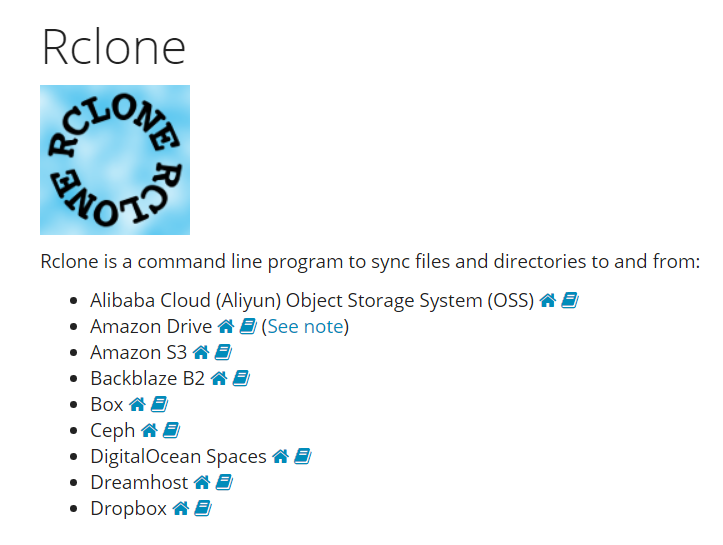
まずは、ホームページで最新の情報を確認します。
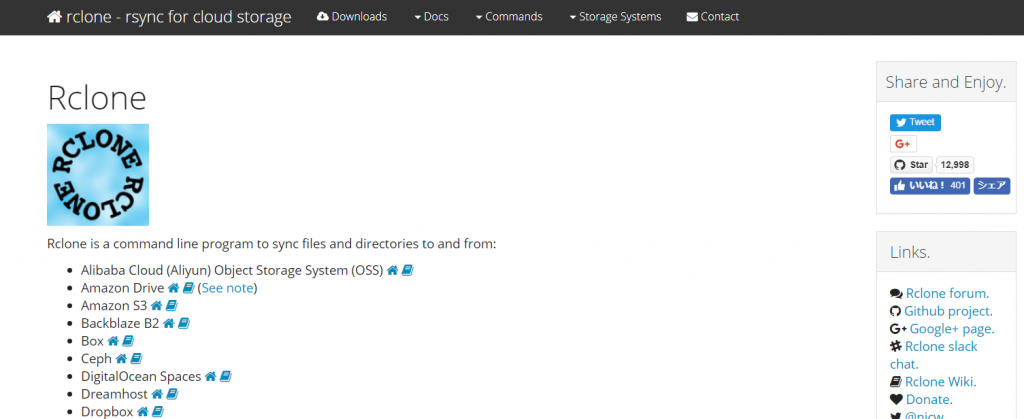
「Rclone is a command line program to sync files and directories to and from:」とのことで沢山のストレージサービスとファイルやディレクトリの同期を行うことができるコマンドラインのプログラムとなります。
2019年2月24日現在、以下の37のストレージサービスに対応しているようです。(上記の公式サイトから転記)
もちろん”Alibaba Cloud OSS”にも対応しています。 ”A”から始まるおかげで先頭にリストされていますね。
- Alibaba Cloud (Aliyun) Object Storage System (OSS)
- Amazon Drive (See note)
- Amazon S3
- Backblaze B2
- Box
- Ceph
- DigitalOcean Spaces
- Dreamhost
- Dropbox
- FTP
- Google Cloud Storage
- Google Drive
- HTTP
- Hubic
- Jottacloud
- IBM COS S3
- Memset Memstore
- Mega
- Microsoft Azure Blob Storage
- Microsoft OneDrive
- Minio
- Nextcloud
- OVH
- OpenDrive
- Openstack Swift
- Oracle Cloud Storage
- ownCloud
- pCloud
- put.io
- QingStor
- Rackspace Cloud Files
- Scaleway
- SFTP
- Wasabi
- WebDAV
- Yandex Disk
- The local filesystem
また、機能は以下の通り。 ()内は当方が日本語化。間違ってたらすみません。
- MD5/SHA1 hashes checked at all times for file integrity(MD5またはSHA1によるハッシュの整合性確認)
- Timestamps preserved on files (タイムスタンプ情報の保持)
- Partial syncs supported on a whole file basis (部分的な同期機能)
- Copy mode to just copy new/changed files (詳細を後述)
- Sync (one way) mode to make a directory identical (詳細を後述)
- Check mode to check for file hash equality (チェック機能)
- Can sync to and from network, eg two different cloud accounts (
2つの異なるクラウドアカウント・サービス間などをネットワーク越しに同期) - (Encryption) backend (暗号化機能)
- (Cache) backend (キャッシュ機能)
- (Union) backend (UnionFSへの対応)
- Optional FUSE mount (rclone mount)
なおフリーソフトです。 ライセンス条項はMITです。
License
https://rclone.org/licence/
This is free software under the terms of MIT the license (check the COPYING file included with the source code).Copyright (C) 2012 by Nick Craig-Wood https://www.craig-wood.com/nick/ Permission is hereby granted, free of charge, to any person obtaining a copy of this software and associated documentation files (the "Software"), to deal in the Software without restriction, including without limitation the rights to use, copy, modify, merge, publish, distribute, sublicense, and/or sell copies of the Software, and to permit persons to whom the Software is furnished to do so, subject to the following conditions: The above copyright notice and this permission notice shall be included in all copies or substantial portions of the Software. THE SOFTWARE IS PROVIDED "AS IS", WITHOUT WARRANTY OF ANY KIND, EXPRESS OR IMPLIED, INCLUDING BUT NOT LIMITED TO THE WARRANTIES OF MERCHANTABILITY, FITNESS FOR A PARTICULAR PURPOSE AND NONINFRINGEMENT. IN NO EVENT SHALL THE AUTHORS OR COPYRIGHT HOLDERS BE LIABLE FOR ANY CLAIM, DAMAGES OR OTHER LIABILITY, WHETHER IN AN ACTION OF CONTRACT, TORT OR OTHERWISE, ARISING FROM, OUT OF OR IN CONNECTION WITH THE SOFTWARE OR THE USE OR OTHER DEALINGS IN THE SOFTWARE.
2. Aliyun Linuxにrcloneをインストール
まずは、公式ドキュメントのインストール手順を確認します。
Install
https://rclone.org/install/
Rclone is a Go program and comes as a single binary file.
Quickstart
Download the relevant binary.
Extract thercloneorrclone.exebinary from the archive
Runrclone configto setup. See rclone config docs for more details.
See below for some expanded Linux / macOS instructions.
See the Usage section of the docs for how to use rclone, or runrclone -h.
上記公式サイト記載のインストールに関するポイントを紹介します。
- rcloneはGo言語で単一のバイナリファイル
- バイナリインストールまたはソースコンパイルインストール
- バイナリはLinuxとMac OS向けを公開
- Ansibleについても言及
今回は手っ取り早くバイナリインストールで進めることにします。
まずはホストにログインし、環境を最新化しておきます。 rootで操作していきますが気にしないでください。本当はsudo使うべきだとは思っています。
| [root@sun ~]# uname -a Linux sun 4.4.95-1.al7.x86_64 #1 SMP Fri Dec 8 15:37:38 CST 2017 x86_64 x86_64 x86_64 GNU/Linux [root@sun ~]# cat /etc/redhat-release Alibaba Cloud Enterprise Linux Server release 17.01.2 (Golden Toad) [root@sun ~]# yum update ~省略~ Updated: golang.x86_64 0:1.11.5-1.el7 golang-bin.x86_64 0:1.11.5-1.el7 golang-src.noarch 0:1.11.5-1.el7 Complete! |
公式サイトのインストール手順は以下の通り。 ベータ版をインストールしたい場合は”-s beta”を指定しましょうとのこと。 今回は通常版で進めます。
Script installation
To install rclone on Linux/macOS/BSD systems, run:curl https://rclone.org/install.sh | sudo bashFor beta installation, run:
https://rclone.org/install/curl https://rclone.org/install.sh | sudo bash -s beta
Note that this script checks the version of rclone installed first and won’t re-download if not needed.
それでは進めていきます。 上記の手順では実行すると即座にインストールもされてしまいます。今回はinstall.shの中身を確認してから進めることにします。
まずはwgetコマンドで”install.sh”をダウンロードします。
| [root@sun src]# wget https://rclone.org/install.sh –2019-02-24 21:57:35– https://rclone.org/install.sh Resolving rclone.org (rclone.org)… 5.153.250.7 Connecting to rclone.org (rclone.org)|5.153.250.7|:443… connected. HTTP request sent, awaiting response… 200 OK Length: 4276 (4.2K) [text/x-sh] Saving to: ‘install.sh’ 100%[======================================>] 4,276 –.-K/s in 0s 2019-02-24 21:57:38 (66.0 MB/s) – ‘install.sh’ saved [4276/4276] [root@sun src]# ls -l total 16 drwxr-xr-x 2 root root 4096 Feb 13 22:44 aliyun drwxr-xr-x 4 root root 4096 Feb 13 22:35 github.com -rw-r–r– 1 root root 4276 Feb 9 20:12 install.sh [root@sun src]# more install.sh ~長いので省略~ |
install.shの中ではざっくりと以下の処理が行われます。 特別な処理はありません。
- スクリプトの実行OSを判断
- モジュールをダウンロード
- コマンドは/usr/bin/rcloneへコピー
- マニュアルはman1へ
スクリプト上は”uname”コマンドでOSを判別し、Linux/freebsd/netbsd/openbsd/osx/solarisに対応するようです。 Solarisも動くのですかね。試したいですけどSPARC環境は手元に無いです。
また”uname -m”でCPUアーキテクチャも見ています。amd64/386/arm/arm64なので先ほどのSolarisもamd64/386向けなんでしょう。
また、install.shの中でモジュールをダウンロードしている処理があります。”https://downloads.rclone.org/rclone-current-$OS-$OS_type.zip”の部分です。
| if [ -z “${install_beta}” ]; then download_link=”https://downloads.rclone.org/rclone-current-$OS-$OS_type.zip” rclone_zip=”rclone-current-$OS-$OS_type.zip” else download_link=”https://beta.rclone.org/rclone-beta-latest-$OS-$OS_type.zip” rclone_zip=”rclone-beta-latest-$OS-$OS_type.zip” fi |
また、ダウンロードしたモジュールのインストール処理は以下になります。
OSが”linux”の場合は、rcloneファイルを/usr/binに.newとしてコピーし、chmodとchownかけて/usr/bin/rcloneにmv(rename)しています。
| case $OS in ‘linux’) #binary cp rclone /usr/bin/rclone.new chmod 755 /usr/bin/rclone.new chown root:root /usr/bin/rclone.new mv /usr/bin/rclone.new /usr/bin/rclone #manuals mkdir -p /usr/local/share/man/man1 cp rclone.1 /usr/local/share/man/man1/ mandb ;; ~省略~ |
前置きが長くなりましたがそれではインストールします。 最終行に以下のコメントが表示されています。
「 Now run “rclone config” for setup. Check https://rclone.org/docs/ for more details. 」
”rclone config”で初期設定しましょう、ということです。
| [root@sun src]# sh ./install.sh % Total % Received % Xferd Average Speed Time Time Time Current Dload Upload Total Spent Left Speed 100 13 100 13 0 0 5 0 0:00:02 0:00:02 –:–:– 5 % Total % Received % Xferd Average Speed Time Time Time Current Dload Upload Total Spent Left Speed 100 8886k 100 8886k 0 0 2539k 0 0:00:03 0:00:03 –:–:– 2539k Archive: rclone-current-linux-amd64.zip creating: tmp_unzip_dir_for_rclone/rclone-v1.46-linux-amd64/ inflating: tmp_unzip_dir_for_rclone/rclone-v1.46-linux-amd64/rclone.1 [text] inflating: tmp_unzip_dir_for_rclone/rclone-v1.46-linux-amd64/rclone [binary] inflating: tmp_unzip_dir_for_rclone/rclone-v1.46-linux-amd64/README.txt [text] inflating: tmp_unzip_dir_for_rclone/rclone-v1.46-linux-amd64/README.html [text] extracting: tmp_unzip_dir_for_rclone/rclone-v1.46-linux-amd64/git-log.txt [empty] Processing manual pages under /usr/share/man… Updating index cache for path /usr/share/man/man4'. Wait...mandb: can't open /usr/share/man/man/man4/crontabs.4: No such file or directory mandb: warning: /usr/share/man/man4/run-parts.4.gz: bad symlink or ROFF.so’ requestUpdating index cache for path /usr/share/man/man8'. Wait...mandb: warning: /usr/share/man/man8/fsck.fat.8.manpage-fix.gz: ignoring bogus filename Updating index cache for path/usr/share/man/man0p’. Wait…done.Checking for stray cats under /usr/share/man… Checking for stray cats under /var/cache/man… Processing manual pages under /usr/share/man/sv… Updating index cache for path /usr/share/man/sv/man1'. Wait...done. Checking for stray cats under /usr/share/man/sv... Checking for stray cats under /var/cache/man/sv... Processing manual pages under /usr/share/man/de... Updating index cache for path/usr/share/man/de/man1′. Wait…done.Checking for stray cats under /usr/share/man/de… Checking for stray cats under /var/cache/man/de… Processing manual pages under /usr/share/man/fr… Updating index cache for path /usr/share/man/fr/man1'. Wait...done. Checking for stray cats under /usr/share/man/fr... Checking for stray cats under /var/cache/man/fr... Processing manual pages under /usr/share/man/hu... Updating index cache for path/usr/share/man/hu/man1′. Wait…done.Checking for stray cats under /usr/share/man/hu… Checking for stray cats under /var/cache/man/hu… Processing manual pages under /usr/share/man/it… Updating index cache for path /usr/share/man/it/man1'. Wait...done. Checking for stray cats under /usr/share/man/it... Checking for stray cats under /var/cache/man/it... Processing manual pages under /usr/share/man/ja... Updating index cache for path/usr/share/man/ja/man1′. Wait…mandb: warning: /usr/share/man/ja/man1/vim.1.gz: whatis parse for vim(1) failedmandb: warning: /usr/share/man/ja/man1/vim.1.gz: whatis parse for ex(1) failed mandb: warning: /usr/share/man/ja/man1/vimtutor.1.gz: whatis parse for vimtutor(1) failed mandb: warning: /usr/share/man/ja/man1/vim.1.gz: whatis parse for rvim(1) failed mandb: warning: /usr/share/man/ja/man1/vim.1.gz: whatis parse for rview(1) failed mandb: warning: /usr/share/man/ja/man1/evim.1.gz: whatis parse for evim(1) failed mandb: warning: /usr/share/man/ja/man1/vim.1.gz: whatis parse for view(1) failed mandb: warning: /usr/share/man/ja/man1/xxd.1.gz: whatis parse for xxd(1) failed mandb: warning: /usr/share/man/ja/man1/vimdiff.1.gz: whatis parse for vimdiff(1) failed done. Checking for stray cats under /usr/share/man/ja… Checking for stray cats under /var/cache/man/ja… Processing manual pages under /usr/share/man/tr… Updating index cache for path /usr/share/man/tr/man1'. Wait...done. Checking for stray cats under /usr/share/man/tr... Checking for stray cats under /var/cache/man/tr... Processing manual pages under /usr/share/man/es... Updating index cache for path/usr/share/man/es/man1′. Wait…done.Checking for stray cats under /usr/share/man/es… Checking for stray cats under /var/cache/man/es… Processing manual pages under /usr/share/man/ko… Updating index cache for path /usr/share/man/ko/man8'. Wait...done. Checking for stray cats under /usr/share/man/ko... Checking for stray cats under /var/cache/man/ko... Processing manual pages under /usr/share/man/en... Updating index cache for path/usr/share/man/en/man7′. Wait…done.Checking for stray cats under /usr/share/man/en… Checking for stray cats under /var/cache/man/en… Processing manual pages under /usr/share/man/sk… Updating index cache for path /usr/share/man/sk/man8'. Wait...done. Checking for stray cats under /usr/share/man/sk... Checking for stray cats under /var/cache/man/sk... Processing manual pages under /usr/share/man/overrides... Updating index cache for path/usr/share/man/overrides/man2′. Wait…mandb: warning: /usr/share/man/overrides/man2/____recv.2.orig.gz: ignoring bogus filenameUpdating index cache for path /usr/share/man/overrides/man1'. Wait...done. Checking for stray cats under /usr/share/man/overrides... Checking for stray cats under /var/cache/man/overrides... Processing manual pages under /usr/share/man/uk... Updating index cache for path/usr/share/man/uk/man8′. Wait…done.Checking for stray cats under /usr/share/man/uk… Checking for stray cats under /var/cache/man/uk… Processing manual pages under /usr/share/man/pt_BR… Updating index cache for path /usr/share/man/pt_BR/man1'. Wait...done. Checking for stray cats under /usr/share/man/pt_BR... Checking for stray cats under /var/cache/man/pt_BR... Processing manual pages under /usr/share/man/pt... Updating index cache for path/usr/share/man/pt/man8′. Wait…done.Checking for stray cats under /usr/share/man/pt… Checking for stray cats under /var/cache/man/pt… Processing manual pages under /usr/share/man/zh_TW… Updating index cache for path /usr/share/man/zh_TW/man1'. Wait...done. Checking for stray cats under /usr/share/man/zh_TW... Checking for stray cats under /var/cache/man/zh_TW... Processing manual pages under /usr/share/man/da... Updating index cache for path/usr/share/man/da/man1′. Wait…done.Checking for stray cats under /usr/share/man/da… Checking for stray cats under /var/cache/man/da… Processing manual pages under /usr/share/man/ru… Updating index cache for path /usr/share/man/ru/man1'. Wait...done. Checking for stray cats under /usr/share/man/ru... Checking for stray cats under /var/cache/man/ru... Processing manual pages under /usr/share/man/cs... Updating index cache for path/usr/share/man/cs/man1′. Wait…done.Checking for stray cats under /usr/share/man/cs… Checking for stray cats under /var/cache/man/cs… Processing manual pages under /usr/share/man/pl… Updating index cache for path /usr/share/man/pl/man1'. Wait...done. Checking for stray cats under /usr/share/man/pl... Checking for stray cats under /var/cache/man/pl... Processing manual pages under /usr/share/man/id... Updating index cache for path/usr/share/man/id/man8′. Wait…done.Checking for stray cats under /usr/share/man/id… Checking for stray cats under /var/cache/man/id… Processing manual pages under /usr/share/man/ca… Updating index cache for path /usr/share/man/ca/man8'. Wait...done. Checking for stray cats under /usr/share/man/ca... Checking for stray cats under /var/cache/man/ca... Processing manual pages under /usr/share/man/zh_CN... Updating index cache for path/usr/share/man/zh_CN/man1′. Wait…done.Checking for stray cats under /usr/share/man/zh_CN… Checking for stray cats under /var/cache/man/zh_CN… Processing manual pages under /usr/local/share/man… Updating index cache for path `/usr/local/share/man/man1′. Wait…done. Checking for stray cats under /usr/local/share/man… Checking for stray cats under /var/cache/man/local… 111 man subdirectories contained newer manual pages. 7003 manual pages were added. 0 stray cats were added. 0 old database entries were purged. rclone v1.46 has successfully installed. Now run “rclone config” for setup. Check https://rclone.org/docs/ for more details. |
初期設定する前にコマンドが存在するか確認します。問題ありませんでした。
| [root@sun src]# which rclone /usr/bin/rclone [root@sun src]# man rclone ~省略~ |
fileコマンドでも確認しておきます。 64-bti対応モジュールですね。
| [root@sun ~]# file /usr/bin/rclone /usr/bin/rclone: ELF 64-bit LSB executable, x86-64, version 1 (SYSV), statically linked, stripped |
” a single binary file. ”との記載もありましたが”ldd”コマンドでダイナミックリンクされていないことを確認しておきます。はい、されていません。
| [root@sun ~]# ldd /usr/bin/rclone not a dynamic executable |
3. rcloneの初期設定
”rclone config”に関する詳細は以下のドキュメントとなります。
https://rclone.org/docs/ 全体的な説明
https://rclone.org/s3/#alibaba-oss Alibaba Cloud OSSに関する説明
上記のAlibaba Cloud OSSに関する説明はAWS S3のドキュメントのサブセットとなっていました。https://rclone.org/s3がAWS S3のメインのドキュメントとなります。
それでは”rclone config”を実行します。
| [root@sun src]# rclone config No remotes found – make a new one n) New remote s) Set configuration password q) Quit config n/s/q> n ★ “n”で新しい設定を作ります name> oss ★定義名を入力します。ここでは”oss”としています。ここで定義した名前を実際のrcloneコマンド実行時に引数として指定することになります。 Type of storage to configure. Enter a string value. Press Enter for the default (“”). Choose a number from below, or type in your own value 1 / A stackable unification remote, which can appear to merge the contents of several remotes \ “union” 2 / Alias for a existing remote \ “alias” 3 / Amazon Drive \ “amazon cloud drive” 4 / Amazon S3 Compliant Storage Provider (AWS, Alibaba, Ceph, Digital Ocean, Dreamhost, IBM COS, Minio, etc) \ “s3” 5 / Backblaze B2 \ “b2” 6 / Box \ “box” 7 / Cache a remote \ “cache” 8 / Dropbox \ “dropbox” 9 / Encrypt/Decrypt a remote \ “crypt” 10 / FTP Connection \ “ftp” 11 / Google Cloud Storage (this is not Google Drive) \ “google cloud storage” 12 / Google Drive \ “drive” 13 / Hubic \ “hubic” 14 / JottaCloud \ “jottacloud” 15 / Local Disk \ “local” 16 / Mega \ “mega” 17 / Microsoft Azure Blob Storage \ “azureblob” 18 / Microsoft OneDrive \ “onedrive” 19 / OpenDrive \ “opendrive” 20 / Openstack Swift (Rackspace Cloud Files, Memset Memstore, OVH) \ “swift” 21 / Pcloud \ “pcloud” 22 / QingCloud Object Storage \ “qingstor” 23 / SSH/SFTP Connection \ “sftp” 24 / Webdav \ “webdav” 25 / Yandex Disk \ “yandex” 26 / http Connection \ “http” Storage> 4 ★AWS S3の”4″を指定します。 ** See help for s3 backend at: https://rclone.org/s3/ ** Choose your S3 provider. Enter a string value. Press Enter for the default (“”). Choose a number from below, or type in your own value 1 / Amazon Web Services (AWS) S3 \ “AWS” 2 / Alibaba Cloud Object Storage System (OSS) formerly Aliyun \ “Alibaba” 3 / Ceph Object Storage \ “Ceph” 4 / Digital Ocean Spaces \ “DigitalOcean” 5 / Dreamhost DreamObjects \ “Dreamhost” 6 / IBM COS S3 \ “IBMCOS” 7 / Minio Object Storage \ “Minio” 8 / Netease Object Storage (NOS) \ “Netease” 9 / Wasabi Object Storage \ “Wasabi” 10 / Any other S3 compatible provider \ “Other” provider> 2 ★ Alibaba Cloud OSSの”2″を入力します。 Get AWS credentials from runtime (environment variables or EC2/ECS meta data if no env vars). Only applies if access_key_id and secret_access_key is blank. Enter a boolean value (true or false). Press Enter for the default (“false”). Choose a number from below, or type in your own value 1 / Enter AWS credentials in the next step \ “false” 2 / Get AWS credentials from the environment (env vars or IAM) \ “true” env_auth> 1 ★ “1”を入力します。 AWS Access Key ID. Leave blank for anonymous access or runtime credentials. Enter a string value. Press Enter for the default (“”). access_key_id> XXXXXXXX ★ access_key_idを入力します。事前にAlibaba Cloudのコンソールで生成しておいてください。 なお、access_key_idと次のsecret_access_keyは減順に管理しましょう。 漏えいするとOSSを悪用されたり、また、access_keyが契約したAlibaba Cloud全体の権限を持っている場合、OSS以外のプロダクトも被害の対象になるかもしれません。 AWS Secret Access Key (password) Leave blank for anonymous access or runtime credentials. Enter a string value. Press Enter for the default (“”). secret_access_key> XXXXXXXX ★ secretを入力します。 Endpoint for OSS API. Enter a string value. Press Enter for the default (“”). Choose a number from below, or type in your own value 1 / East China 1 (Hangzhou) \ “oss-cn-hangzhou.aliyuncs.com” 2 / East China 2 (Shanghai) \ “oss-cn-shanghai.aliyuncs.com” 3 / North China 1 (Qingdao) \ “oss-cn-qingdao.aliyuncs.com” 4 / North China 2 (Beijing) \ “oss-cn-beijing.aliyuncs.com” 5 / North China 3 (Zhangjiakou) \ “oss-cn-zhangjiakou.aliyuncs.com” 6 / North China 5 (Huhehaote) \ “oss-cn-huhehaote.aliyuncs.com” 7 / South China 1 (Shenzhen) \ “oss-cn-shenzhen.aliyuncs.com” 8 / Hong Kong (Hong Kong) \ “oss-cn-hongkong.aliyuncs.com” 9 / US West 1 (Silicon Valley) \ “oss-us-west-1.aliyuncs.com” 10 / US East 1 (Virginia) \ “oss-us-east-1.aliyuncs.com” 11 / Southeast Asia Southeast 1 (Singapore) \ “oss-ap-southeast-1.aliyuncs.com” 12 / Asia Pacific Southeast 2 (Sydney) \ “oss-ap-southeast-2.aliyuncs.com” 13 / Southeast Asia Southeast 3 (Kuala Lumpur) \ “oss-ap-southeast-3.aliyuncs.com” 14 / Asia Pacific Southeast 5 (Jakarta) \ “oss-ap-southeast-5.aliyuncs.com” 15 / Asia Pacific Northeast 1 (Japan) \ “oss-ap-northeast-1.aliyuncs.com” 16 / Asia Pacific South 1 (Mumbai) \ “oss-ap-south-1.aliyuncs.com” 17 / Central Europe 1 (Frankfurt) \ “oss-eu-central-1.aliyuncs.com” 18 / West Europe (London) \ “oss-eu-west-1.aliyuncs.com” 19 / Middle East 1 (Dubai) \ “oss-me-east-1.aliyuncs.com” endpoint> 15 ★今回は東京リージョンのOSSを利用するので”15″を入力 Canned ACL used when creating buckets and storing or copying objects. This ACL is used for creating objects and if bucket_acl isn’t set, for creating buckets too. For more info visit https://docs.aws.amazon.com/AmazonS3/latest/dev/acl-overview.html#canned-acl Note that this ACL is applied when server side copying objects as S3 doesn’t copy the ACL from the source but rather writes a fresh one. Enter a string value. Press Enter for the default (“”). Choose a number from below, or type in your own value 1 / Owner gets FULL_CONTROL. No one else has access rights (default). \ “private” 2 / Owner gets FULL_CONTROL. The AllUsers group gets READ access. \ “public-read” / Owner gets FULL_CONTROL. The AllUsers group gets READ and WRITE access. 3 | Granting this on a bucket is generally not recommended. \ “public-read-write” 4 / Owner gets FULL_CONTROL. The AuthenticatedUsers group gets READ access. \ “authenticated-read” / Object owner gets FULL_CONTROL. Bucket owner gets READ access. 5 | If you specify this canned ACL when creating a bucket, Amazon S3 ignores it. \ “bucket-owner-read” / Both the object owner and the bucket owner get FULL_CONTROL over the object. 6 | If you specify this canned ACL when creating a bucket, Amazon S3 ignores it. \ “bucket-owner-full-control” acl> 1 ★ 既定の”1″で進める The storage class to use when storing new objects in OSS. Enter a string value. Press Enter for the default (“”). Choose a number from below, or type in your own value 1 / Default \ “” 2 / Standard storage class \ “STANDARD” 3 / Archive storage mode. \ “GLACIER” 4 / Infrequent access storage mode. \ “STANDARD_IA” storage_class> 1 ★ 既定値の”1″を入力 Edit advanced config? (y/n) y) Yes n) No y/n> y ★ “y”を入力 Canned ACL used when creating buckets. For more info visit https://docs.aws.amazon.com/AmazonS3/latest/dev/acl-overview.html#canned-acl Note that this ACL is applied when only when creating buckets. If it isn’t set then “acl” is used instead. Enter a string value. Press Enter for the default (“”). Choose a number from below, or type in your own value 1 / Owner gets FULL_CONTROL. No one else has access rights (default). \ “private” 2 / Owner gets FULL_CONTROL. The AllUsers group gets READ access. \ “public-read” / Owner gets FULL_CONTROL. The AllUsers group gets READ and WRITE access. 3 | Granting this on a bucket is generally not recommended. \ “public-read-write” 4 / Owner gets FULL_CONTROL. The AuthenticatedUsers group gets READ access. \ “authenticated-read” bucket_acl> 1 ★ 既定の”1″を入力 Cutoff for switching to chunked upload Any files larger than this will be uploaded in chunks of chunk_size. The minimum is 0 and the maximum is 5GB. Enter a size with suffix k,M,G,T. Press Enter for the default (“200M”). upload_cutoff> 200M ★ 既定の”200M”を入力 Chunk size to use for uploading. When uploading files larger than upload_cutoff they will be uploaded as multipart uploads using this chunk size. Note that “–s3-upload-concurrency” chunks of this size are buffered in memory per transfer. If you are transferring large files over high speed links and you have enough memory, then increasing this will speed up the transfers. Enter a size with suffix k,M,G,T. Press Enter for the default (“5M”). chunk_size>5M ★ 既定の”5M”を入力 Don’t store MD5 checksum with object metadata Enter a boolean value (true or false). Press Enter for the default (“false”). disable_checksum>false ★ 既定の”false”を入力 An AWS session token Enter a string value. Press Enter for the default (“”). session_token> ★ 既定で進めるためNULLでEnter Concurrency for multipart uploads. This is the number of chunks of the same file that are uploaded concurrently. If you are uploading small numbers of large file over high speed link and these uploads do not fully utilize your bandwidth, then increasing this may help to speed up the transfers. Enter a signed integer. Press Enter for the default (“4”). upload_concurrency> ★ 既定で進めるためNULLでEnter If true use path style access if false use virtual hosted style. If this is true (the default) then rclone will use path style access, if false then rclone will use virtual path style. See the AWS S3 docs for more info. Some providers (eg Aliyun OSS or Netease COS) require this set to false. Enter a boolean value (true or false). Press Enter for the default (“true”). force_path_style> ★ 既定で進めるためNULLでEnter If true use v2 authentication. If this is false (the default) then rclone will use v4 authentication. If it is set then rclone will use v2 authentication. Use this only if v4 signatures don’t work, eg pre Jewel/v10 CEPH. Enter a boolean value (true or false). Press Enter for the default (“false”). v2_auth> ★ 既定で進めるためNULLでEnter Remote config [oss] type = s3 provider = Alibaba env_auth = false access_key_id = XXXXXXXXX secret_access_key = XXXXXXXXX endpoint = oss-ap-northeast-1.aliyuncs.com acl = private bucket_acl = private y) Yes this is OK e) Edit this remote d) Delete this remote y/e/d> y ★ “y”を入力 Current remotes: Name Type ==== ==== oss s3 e) Edit existing remote n) New remote d) Delete remote r) Rename remote c) Copy remote s) Set configuration password q) Quit config e/n/d/r/c/s/q> q ★ “q”を入力 |
4. lsしてみる
初期設定が終わりましたので早速rcloneを利用してAlibaba Cloud OSSにアクセスしてみましょう。
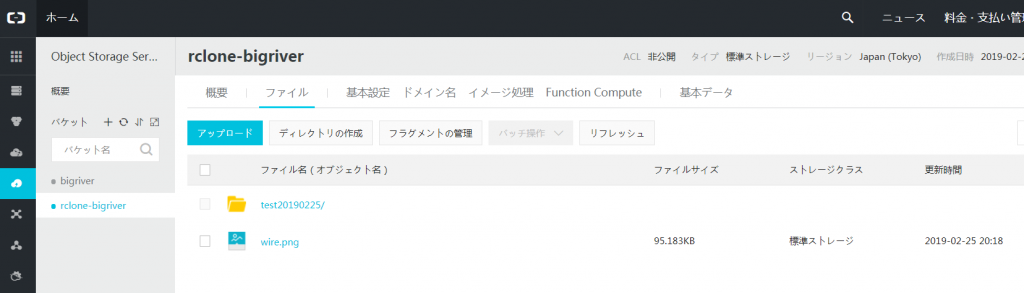
まずはOSSのバケットにダミーのデータを作ります。 テスト用バケットの”rclone-bigriver”は空っぽの状態です。
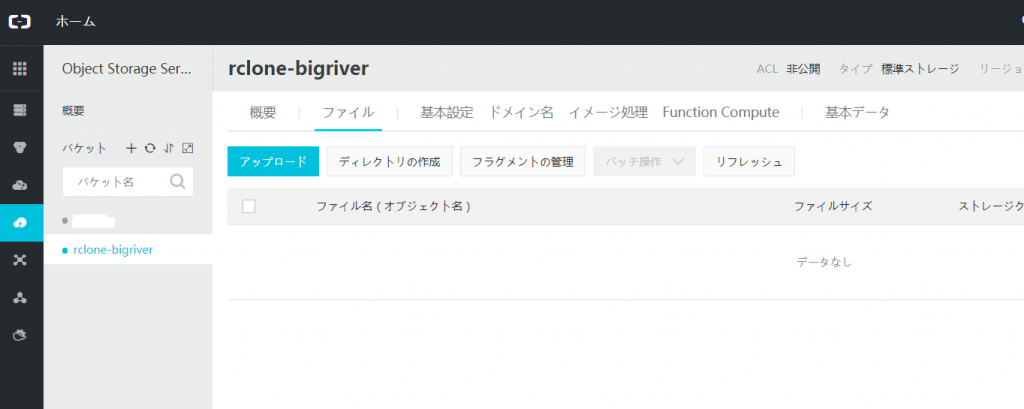
ダミーのディレクトリとファイルを作りました。
それではrcloneコマンドを使ってみましょう。実行の書式は以下になります。
rclone ls <rclone configで指定した定義名>:<バケット名>
| [root@sun ~]# rclone ls oss:rclone-bigriver 97467 wire.png 28851 test20190225/w10.png [root@sun ~]# |
レスポンスは速いです。 実測します。 オブジェクトが2つしかないこともあり速いですね!
| [root@sun ~]# time rclone ls oss:rclone-bigriver 97467 wire.png 28851 test20190225/w10.png real 0m0.075s user 0m0.040s sys 0m0.008s |
実は上記の紹介の前に少しハマっています。最初、”oss”に入力すべき情報を勘違いしていてずっと”s3”を指定し、動かないなーと悩みつつ、ドキュメントを読みつつ、インターネットの情報を探しつたりしていました。
実際のエラーは以下。
| [root@sun ~]# rclone ls s3:rclone-bigriver 2019/02/25 19:27:47 Failed to create file system for “s3:rclone-bigriver”: didn’t find section in config file |
「 didn’t find section in config file 」ということでrcloneの設定ファイルに”section”が見つからないというわけです。
実際の~/.config/rclone/rclone.confファイルを見てみると[oss]がsectionなのですが、type=s3の”s3″を指定するものと勘違いしていたわけです。
| [root@sun rclone]# pwd /root/.config/rclone [root@sun rclone]# cat rclone.conf [oss] type = s3 provider = Alibaba env_auth = false access_key_id = XXXXXXXXXXXXXXXXXXXX secret_access_key = XXXXXXXXXXXXXXXXXXXX endpoint = oss-ap-northeast-1.aliyuncs.com acl = private |
この章の最後に”rclone ls”のその他オプションを紹介します。
”rclone ls –help”を実行するとオプションの紹介があります。 UNIXやLinuxのように”ls -l”とかではなくlsl/lsd/lsf/lsjsonと引数に指定することがわかります。
| [root@sun rclone]# rclone ls –help ~省略~ There are several related list commands ls to list size and path of objects onlylsl to list modification time, size and path of objects onlylsd to list directories onlylsf to list objects and directories in easy to parse formatlsjson to list objects and directories in JSON format ~省略~ |
順番に実行してみます。
| [root@sun rclone]# rclone ls oss:rclone-bigriver 97467 wire.png 28851 test20190225/w10.png [root@sun rclone]# [root@sun rclone]# rclone lsl oss:rclone-bigriver 97467 2019-02-25 19:18:08.000000000 wire.png 28851 2019-02-25 19:18:23.000000000 test20190225/w10.png [root@sun rclone]# [root@sun rclone]# rclone lsd oss:rclone-bigriver 0 2019-02-25 19:36:44 -1 test20190225 [root@sun rclone]# [root@sun rclone]# rclone lsf oss:rclone-bigriver test20190225/ wire.png [root@sun rclone]# [root@sun rclone]# rclone lsjson oss:rclone-bigriver [ {“Path”:”test20190225″,”Name”:”test20190225″,”Size”:0,”MimeType”:”inode/directory”,”ModTime”:”2019-02-25T19:36:59.805319908+08:00″,”IsDir”:true}, {“Path”:”wire.png”,”Name”:”wire.png”,”Size”:97467,”MimeType”:”image/png”,”ModTime”:”2019-02-25T11:18:08.000000000Z”,”IsDir”:false} ] [root@sun rclone]# |
5. Copy してみる
次はrcloneを使ってAlibaba Cloud OSSにファイルをコピーしてみます。
まずは実行オプションを調べてみます。”rclone copy –help”を実行します。
| [root@sun rclone]# rclone copy –help Copy the source to the destination. Doesn’t transfer unchanged files, testing by size and modification time or MD5SUM. Doesn’t delete files from the destination. Note that it is always the contents of the directory that is synced, not the directory so when source:path is a directory, it’s the contents of source:path that are copied, not the directory name and contents. If dest:path doesn’t exist, it is created and the source:path contents go there. For example rclone copy source:sourcepath dest:destpathLet’s say there are two files in sourcepath sourcepath/one.txt sourcepath/two.txtThis copies them to destpath/one.txt destpath/two.txtNot to destpath/sourcepath/one.txt destpath/sourcepath/two.txtIf you are familiar with rsync, rclone always works as if you hadwritten a trailing / – meaning “copy the contents of this directory”. This applies to all commands and whether you are talking about the source or destination. See the –no-traverse option for controlling whether rclone lists the destination directory or not. Supplying this option when copying a small number of files into a large destination can speed transfers up greatly. For example, if you have many files in /path/to/src but only a few of them change every day, you can to copy all the files which have changed recently very efficiently like this: rclone copy --max-age 24h --no-traverse /path/to/src remote:Note: Use the -P/--progress flag to view real-time transfer statisticsUsage: rclone copy source:path dest:path [flags] Flags: -h, –help help for copy Use “rclone [command] –help” for more information about a command. Use “rclone help flags” for to see the global flags. Use “rclone help backends” for a list of supported services. |
説明の中に”–max-age”で指定時間内のファイルのみコピーすることが出来るとexampleの紹介がありますが、その他オプションの情報は出てきません。これは以下の公式ホームページを見た方がよいでしょう。
https://rclone.org/commands/rclone_copy/
このページに行くと大量のオプションが紹介されています。 ここでは紹介はしません。
とりあえず、copyを実行してみます。
| [root@sun src]# rclone copy aliyun/ oss:rclone-bigriver [root@sun src]# |
成功も失敗も、特にメッセージがありません。 ”rclone ls”で見てみましょう。
| [root@sun src]# rclone ls oss:rclone-bigriver 25539909 aliyun 9466759 aliyun-cli-linux-3.0.9-amd64.tgz 97467 wire.png 28851 test20190225/w10.png [root@sun src]# rclone lsl oss:rclone-bigriver 25539909 2019-01-24 14:30:37.000000000 aliyun 9466759 2019-01-24 14:30:44.000000000 aliyun-cli-linux-3.0.9-amd64.tgz 97467 2019-02-25 19:18:08.000000000 wire.png 28851 2019-02-25 19:18:23.000000000 test20190225/w10.png |
Alibaba Cloud OSSにオブジェクトとしてアップロードされたことは確認出来ました。 ただ、1つ気づいたことがあります。sourceに”aliyun/”とディレクトを指定すると、ディレクトリの中の2つのファイルがコピーされる動作ですね。
6. まとめ
今回、初めてrcloneを利用してみました。 比較的簡単にインストールし利用できることが確認出来ました。 まだ試していませんがWindows版もあるとのことでAlibaba Cloud OSSを安価なバックアップ先に利用したい場合などに最適なツールとなりそうです。
今回は基本編としていますが応用編は以下を紹介する予定です。
- rcloneの設定ファイルの暗号化 (設定ファイルにはaccess_keyの情報がある。暗号化しないと平文で漏えいの危険アリ)
- Copy/Syncのスループットの実測
- Alibaba Cloud OSSからAzureやGCPのオブジェクトストレージへのコピー
以上